
Making Of Ebony Living
July 6, 2023
Hello Folks,
We are Team Impact from India this is our first blog post about Making Of. After so many questions about our workflow and special techniques we decided to post our workflow in our Blog. It is
our great pleasure to share knowledge with our CGI community. We are glad and honoured to do this.
Tools mostly we used :
Sketch Up, Autodesk 3ds max 2017, Corona Render, Adobe Photoshop.
Whenever we start new Project we first meet Client & Architect and ask their requirement for this Project what they want to show and what is their view behind this project. We discuss with them about Design and Basic Concepts
and we collect lot of references for this project. Later we discuss with our team also how to approach this Project.
Reference from Client :
It is our first step to gather some references form Client & Architect.


Modeling :
For Basic Modeling we prefer Google Sketch UP. It is very fast and efficient way to create Structure Model. We highly recommend this tool.

Camera & Basic Lighting Setup :
After Finishing Model we start working in 3ds Max. Here we Import Skp Model as .3ds extension and setup Basic Camera Angle. We use Max Standard Camera with Script
Overscan, ImageComphelper to Frame our View.
We follow Perspective Rule of Third also to better visualise Camera Angle. We use Corona Sun&Sky for initial light setup.

Here where we apply override material with 180 Gray Value to all object except window glasses to setup basic lighting and Exposure.

In this we generally focus on Basic Camera Exposure & Light Angle.

Furniture Models :
For Furniture Model there are great many site we can use. For this Project we have mostly model furniture as Clients required Specific Set of Furniture & Props we use 3ds Max for this purpose.

Materials :
This is where we put our most effort Materials. Material is one of the most important things for Making A Realistic Render. We always use real world reference & Values while creating materials. We focus on
PBR Shading Technology in Corona it is highly efficient and easy way to create Realistic Materials.


After Modelling and Material We Place them in our Scene.

Now its Time to add Lights. Lighting in corona is very easy and fun, we use ies lights to light up interior spaces. There are grate many sources to get .ies files just Google it.


Now it’s Time to Quick Render Test. This is where real Fun begins we use Corona LightMix Feature. You can find Tutorial on
YouTube. We setup basic LightMix Passes first. Then we start Test Render using Corona Interactive Rendering Features. It is Great Tool to lighting in realtime.

Here are some Test on how individual LightMix Passes will Look like.

Here is Final LightMix Parameters on which we settled for.

Render settings :
This is Corona Render’s Magic Part. There is nothing to do here. As Corona Developer constantly explains that they don’t want Artist to burden with great many settings. Rather then tweaking lot of setting as other competitive
renders require corona focuses on simpler yet effective workflow. You will just have to set numbers of passes for rendering your view and let everything else to their defaults. Below here are screens from our settings.

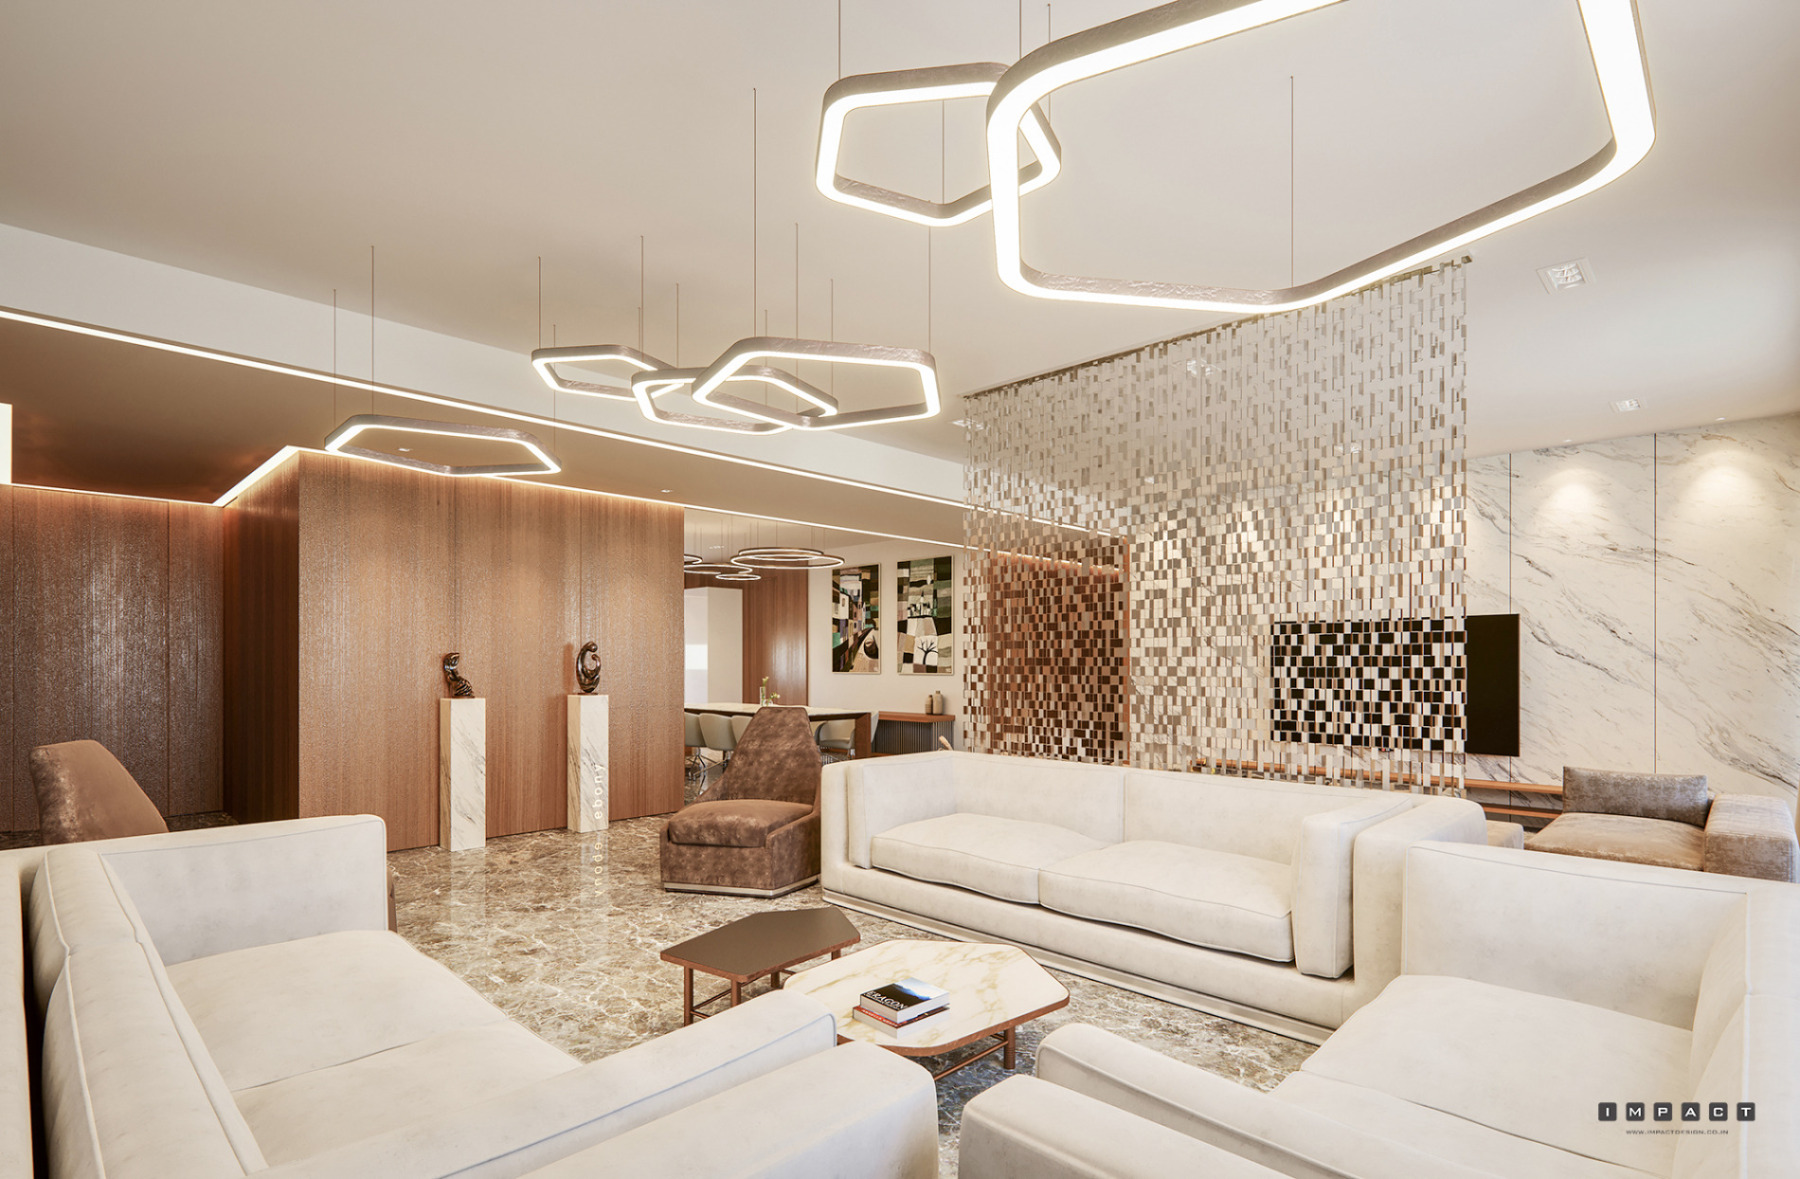
Here is the Final Image with Editing. We used Photoshop for Post Processing.
Thank you for reading this article. if you want to see more images of this project you can check it on our
Behance page.
TEAM IMPACT 3D
www.impactdesign.co.in